List Auto-Sync
With List Auto-Sync you can immediately add or remove a contact in the turboDial copy of any Saved Search List using automation in your Campaign Builder.
For example, if your campaign applies a tag to a contact to include them in a Saved Search List you’ve setup, you can also use List Auto-Sync in your campaign to immediately add them to the copy of that List saved in turboDial without requiring any action from your users.
This ensures your calling agents will call your recently added Contacts, and avoids the possibility of calling a Contact who should not be called. Auto-Sync works for any List, including those that use Power Dial or Dynamic Dial, and those that don’t.
Only turboDial accounts with the Volume Dialing add-on may use this utility.
Benefits of List Auto-Sync
When you load a Saved Search List in turboDial a copy of the List is retrieved from Keap and saved by turboDial. Read on to understand the problem that poses and how List Auto-Sync can help.
Problem: After turboDial’s copy of the List is loaded, any new changes to the List in Keap will not be reflected in the turboDial copy of the List until the List is manually re-loaded again from Keap. That can lead to some potential problems. In one scenario, your calling team might call a contact who should not be called. For example, if a contact just purchased your solution it would be unfortunate to have one of your agents call them later with a discounted offer.
Solution: To avoid the problem, as soon as a contact becomes a paying customer use List Auto-Sync to remove the contact from turboDial’s loaded copy of the List at the same time you remove them from your Saved Search List for prospects.
With List Auto-Sync, a Saved Search list currently loaded in turboDial can be updated by Campaign Builder to stay consistent with the original version in Keap. This allows your calling team to continue working without periodically reloading and starting over in their list, and you can be certain that they will not be calling contacts with the wrong offers.
Video Overview & Demonstration
Using List Auto-Sync
You use List Auto-Sync by installing HTTP POST processes in Keap Campaign Builder sequences to trigger an Auto-Sync at each place a Contact leaves or enters a Saved Search List.
Saved Search List Types
There are many ways to configure a Saved Search List in Keap. These instructions will not address all scenarios but will focus on the most common scenario: A Saved Search based on a single Tag.
With a single Tag based list:
- If a contact has the tag then they are in the list
- If a contact does not have the tag they are not in the list
How Contacts Enter and Leave the List
IMPORTANT: It is up to you to make sure Contacts are added to or removed from your Keap Saved Searches—List Auto-Sync does not add or remove Contacts from your Keap Saved Search(es). All it does is update turboDial’s copy of your Keap Saved Search(es) loaded into turboDial’s servers.
Continuing with the example of a Saved Search based on a single Tag, there are different methods for how the Tag is added to and removed from Contacts.
- The Tag is added or removed in your campaign automation
- The Tag is added or removed manually
- The Tag is added or removed by the Purchase Actions or Billing Actions in Keap
- The Tag is added or removed with a combination of approaches
If you have the first case then you are ready to proceed with installing List Auto-Sync. Since the list is already managed by campaign automation it will be simple to locate the best places to install the HTTP POSTs you need to trigger the List Auto-Sync.
If you have the second, third or fourth case then you will need to first modify your Keap system to include campaign automation when the Tag is added and removed. You may wish to use the services of a knowledgeable Keap consultant to help with this step.
Location for the HTTP POSTs
Now that you have campaign automation where the Tag is added and removed the next step is to install an HTTP POST for List Auto-Sync at each point where the Tag is added or removed: the HTTP POST should be placed immediately next to the Tag add or remove process.
Here’s an example showing a List Auto-Sync Remove next to the Tag remove process:

Configuring the Auto-Sync HTTP POSTs
There are 2 types of HTTP POSTs for List Auto-Sync:
- Auto-Sync Add: Contacts are always added at the end of the list.
- Auto-Sync Remove.
Use the following template as a guide for setting up your HTTP POST.
POST URL
| http://apps.turbodial.biz/ListUpdate.php |
Name/Value Pairs (The Names are on the left and the Values are on the right.)
| contactId | ~Contact.Id~ |
| key | fill in: your turboDial encrypted key |
| action | fill in: add, or remove |
| list | fill in: *all*, or an ID #, or a List Name |
| first name | ~Contact.FirstName~ |
| last name | ~Contact.LastName~ |
| phone | ~Contact.Phone1~ |
| country | ~Contact.Country~ |
| date created | ~Date.Current~ |
You can use copy-paste with the above list to put each item into an HTTP POST as you are configuring it. Items in red should not be copy-pasted – you will need to install your own values.
Always use copy-paste for the POST URL and the Names in the left column.
Explaining Each Name/Value Pair
- The contactId is the ID number Keap assigns to each contact. It is a non-zero number. You will always use a merge field for this, as shown above.
- The key is the encrypted string turboDial assigns to you. Be sure to capture the entire string when you copy it.
- The action value should be set to add or remove and designates whether the contact should be added to the list you specified or removed from it.
- The list is the specific list or lists loaded into turboDial that you want updated. There are three alternatives for how to specify the list:
- Enter *all* if you want all lists currently loaded into turboDial to receive the update.
- Enter a list name if you only want to update lists with names that match the value you provide. In this case you can provide a portion of a name. For example, if you specify ‘Hot Leads‘ that name will match lists that are named ‘Hot Leads‘, ‘Hot Leads – Tom‘, and ‘Hot Leads – Sally‘, and the update will be applied to all of those lists.
- Enter a list ID number if you want to be sure that only the one list you specify will be udpated. See the video for instructions on how to find the ID number for a list.
- The first name for the Contact to be added to the list. You will use a merge field as indicated in the example above. This item is required if the action is set to add but not required for a remove.
- The last name for the Contact to be added to the list. You will use a merge field as indicated in the example above. This item is required if the action is set to add but not required for a remove.
- The phone for the Contact to be added to the list. You will use a merge field as indicated in the example above. This item is required if the action is set to add but not required for a remove.
- The country is the Country in the Contact’s Billing Address, and is used by turboDial to properly format the phone number. If the country field is not filled in and if the to phone number is not in International dialing format, then turboDial will configure the number using the Country of the turboDial account owner. This item is not required for a remove. You will use a merge field for this as shown above.
- The date created for the Contact to be added to the list is the Contact Record creation date. For Dynamic Dial that value is sometimes used to call the most recently created Contacts first. This field is optional but should be included when the action is ‘add’. This item is not required for a remove. You will use a merge field for the current date as shown above, since the creation date of the Contact Record is not available as a merge field.
Working Example HTTP POST
This HTTP POST will add the Contact to the list whose list ID # is 182.

Test
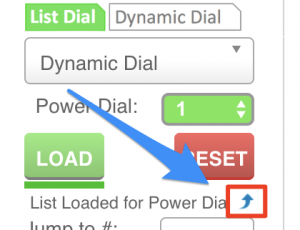
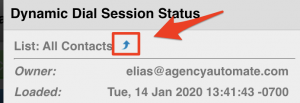
If you want to test to make sure Contacts are being added or removed, that can be done by first loading a list in turboDial (meaning, pick a list from the dropdown then clicking the LOAD button), then clicking the blue up-arrow icon that appears after the list is loaded:


Extreme Pro Tip
Only if you are very knowledgeable and experienced with Keap… then realize:
- An Action Set HTTP POST experiences shorter queuing delays than a CB HTTP POST
- turboDial will also accept the HTTP parameters in the GET query string
- So, use an Keap Action Set for even faster list updating
- Dissect this example and adapt it for your needs:
Create an action set http post to:
http://apps.turbodial.biz/ListUpdate.php?key=sYEsUq%2F8RWPHzxjU%2F65tG9E%2F39do0PQlpqCQYJQ%3D&list=%2Aall%2A&action=add
- You must url-encode each parameter, and can use this site to do it:
http://www.url-encode-decode.com/
