Call Recording Reports
Call Recording reports are useful for both the calling agents and managers in your team, when they need to access recordings of their calls:
- To review and improve sales scripts as well as other customer contact scripts
- To review next steps and actions for the Contact
- To clean up and remove old recordings
This support document will give guidelines on what information can be used to generate Recorded Call Reports, along with how a widget can be used to summarize the Recorded Call Report on your Keap Dashboard. It will include:
- How to identify recorded calls
- Selecting a time period
- Selecting Users
- Useful fields to include in the Recorded Call Report
- Dashboard report with Widget summary statistics
Using Keap “Task Note Reports”
Obtaining a report of recorded calls may be accomplished using Task Note Reports in the Admin section of Keap. A Note is automatically stored by turboDial after each completed call and that Note will include the link to the recording for the call if it was recorded. It is useful to be familiar with the format of these Call Notes – see Automatic Call Notes.
An example of the Recorded Call report is shown below:
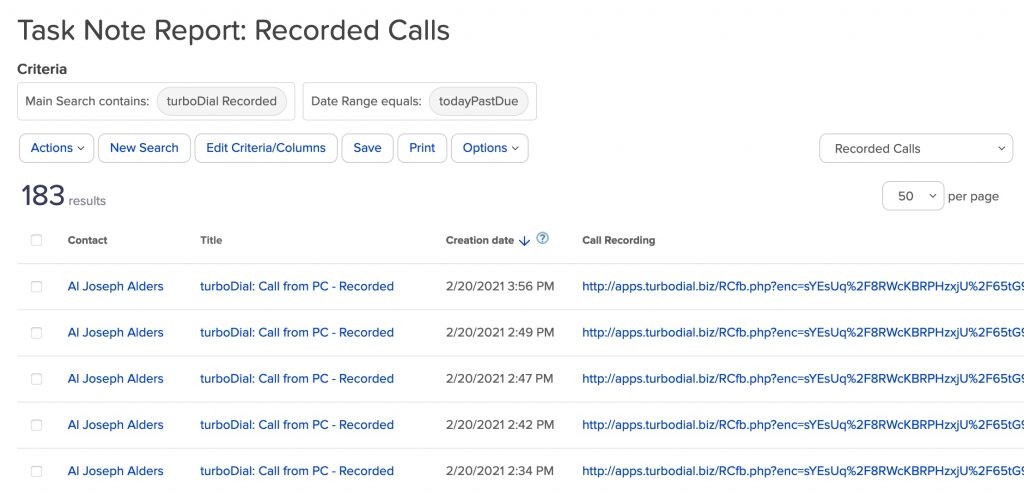
(Please ignore that all calls are to the same fictitious person – this data is from test calls)
To play a recording, click on one of the blue links in the Call Recording column. See also How To Play back a recording
How to identify recorded calls
There are 2 fields in the Task Note Report that are used to identify Recorded Calls. They are:
- Under the Search tab, in the Main Search field, type in “Recorded”.
- Under the Custom Fields tab, in the Call Recording field, set the Starts with field to “http”.
Setting both of these fields is needed in order to avoid including Voicemail recordings and Deleted recordings. The recorded call list will include both Inbound and Outbound calls.
When a recorded call is placed on HOLD or PARK and then resumed again it is treated as a new call and a separate Note record will exist for it.
Selecting a time period
To select a time period for the report, under the Misc Criteria tab, in the Completion Date Interval field, select “Last 7 Days” or one of the other interval options such as “Last 30 Days” or “Month to Date”.
Selecting Users
Individual Users may review their own recordings, and Account Owners may review all User recordings or may specify the User.
Under the Misc Criteria tab, choose the User(s) from the “Assigned To” field. If this field is not set, all Users will be the default.
Useful fields to include in the Recorded Call Report
Under the “Columns” tab you can select fields to be displayed in the report. Nine fields are included in the Recorded Call Report used as an example here. They are:
- ID
- Title – Clickable
- Creation date
- Inbound number
- User
- Contact – Clickable
- Duration of the recording
- Call recording – clickable link, this is a long string
- Task Notes – this is a long string
Other fields, such as Call Outcome, may be useful to include – depending on the purpose of the report.
Dashboard report with Widget summary statistics
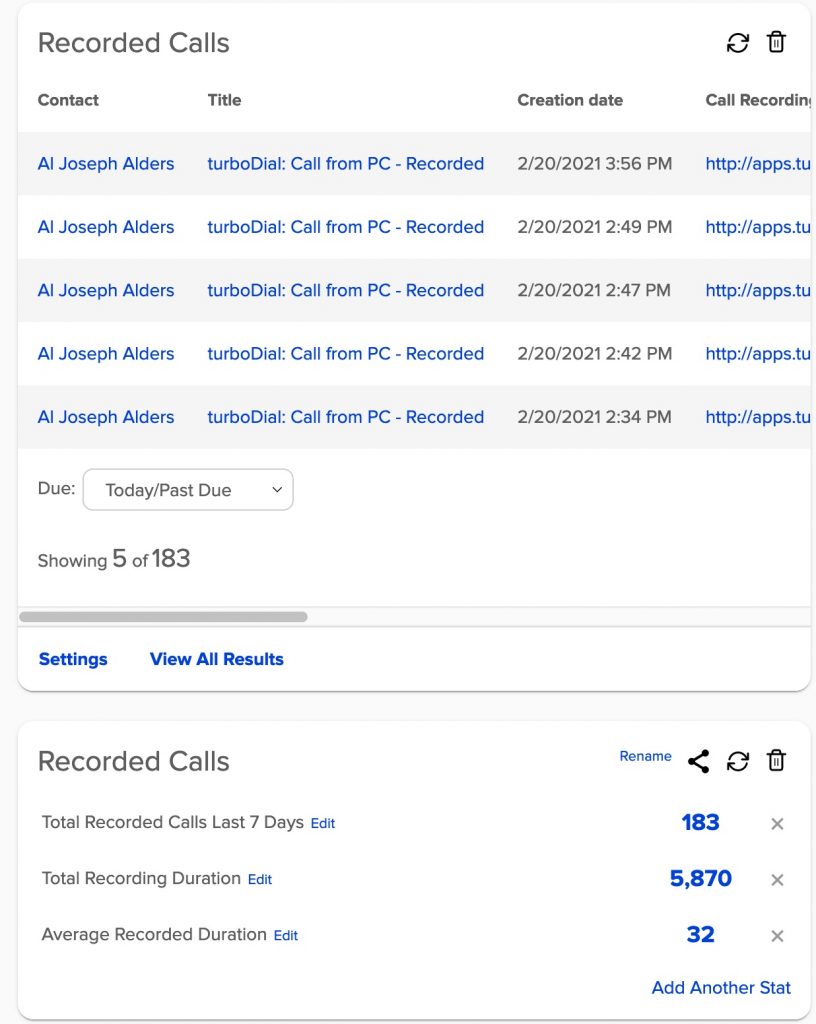
The Recorded Call Report can be included in the Keap Dashboard, as well as a Widget with summary statistics. An example is shown here:
Include the Saved Report in the Dashboard
To include the Recorded Call report in the dashboard, this can be done when the report is created and saved (Check the box “Add this search to the User Home.” If the report is saved without this checkbox marked, with the report displayed, in the Options tab, click on “Add to User Home”.
Add a Recorded Call Widget
Click the “Add Widget” button on the Dashboard, and then click on “Add to Dashboard” for “Usage Stats”. That will add a Widget with title “Custom Statistics”. Click rename to change the title with your choice of name.
To set up the statistics in the Widget, click on the “Add Another Stat” within the Widget box. There are 3 Statistics shown in this example. They are:
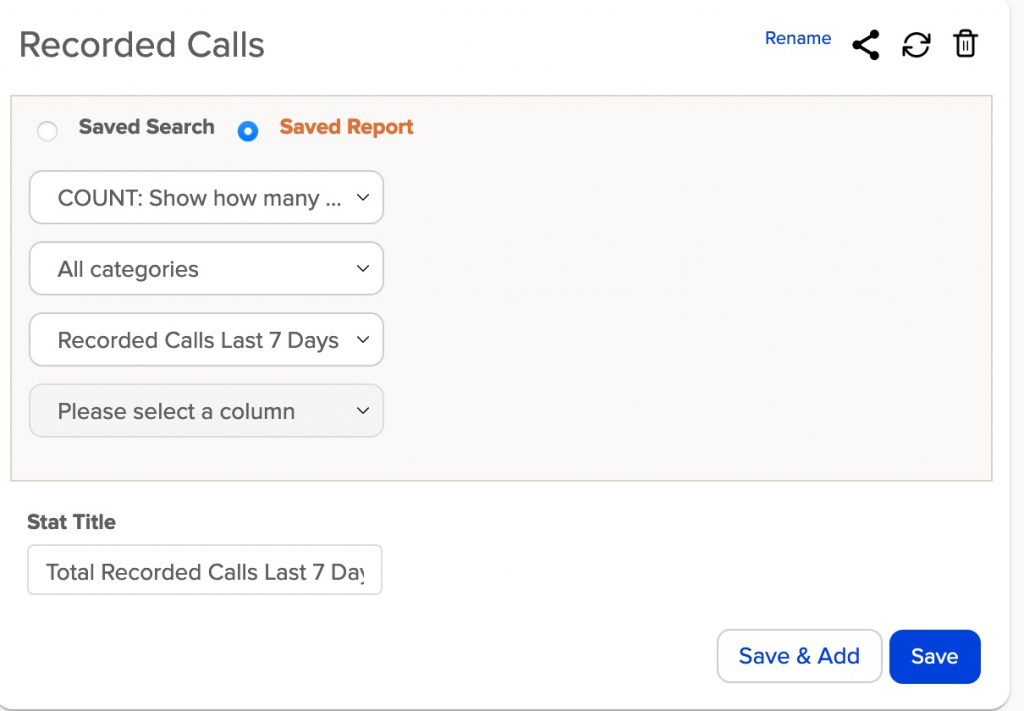
- Total Recorded Calls Last 7 Days.
- Click on “Saved Report”
- Choose “COUNT:” from the first pulldown
- Don’t change the second pulldown – leave it as “All categories”
- Choose the saved report name – in this example it is “Recorded Calls Last 7 Days”
- Choose a name for this statistic, such as “Total Recorded Calls Last 7 Days”
- Click “Save”
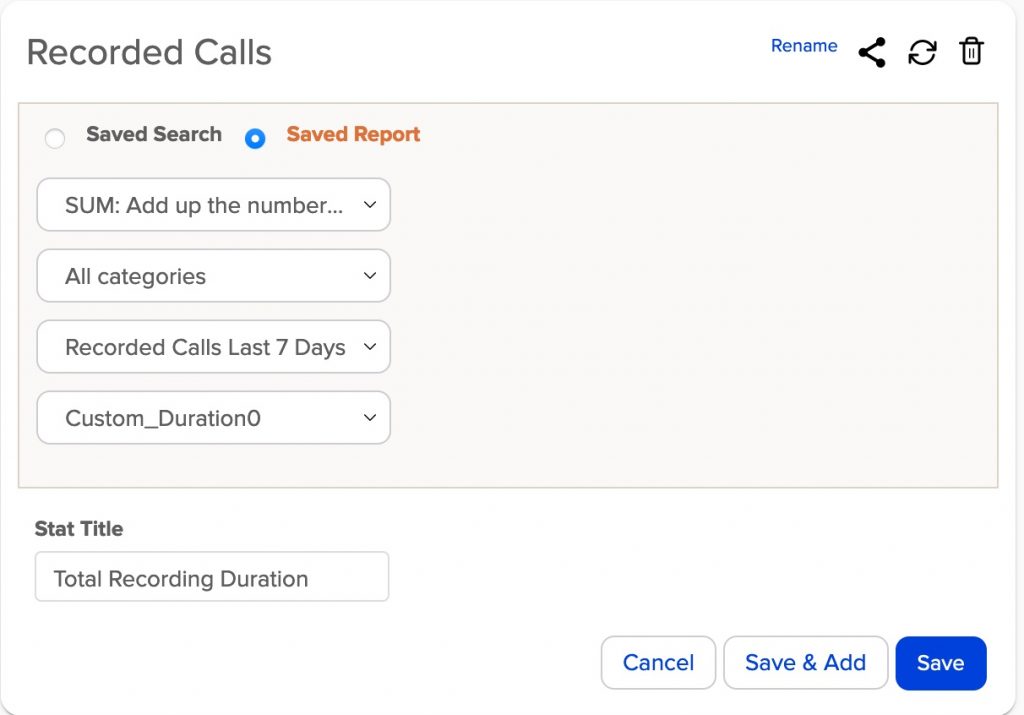
- Total Recording Duration.
- Click “Add Another Stat”
- Choose “Saved Report”
- Choose “SUM:…” from the first pulldown
- Don’t change the second pulldown – leave it as “All categories”
- Choose the saved report name – in this example it is “Recorded Calls Last 7 Days”
- Select a column in the report to Sum, which in the example is “Custom_Duration0”
- Choose a name for this statistic, such as “Total Recording Duration”
- Click “Save”
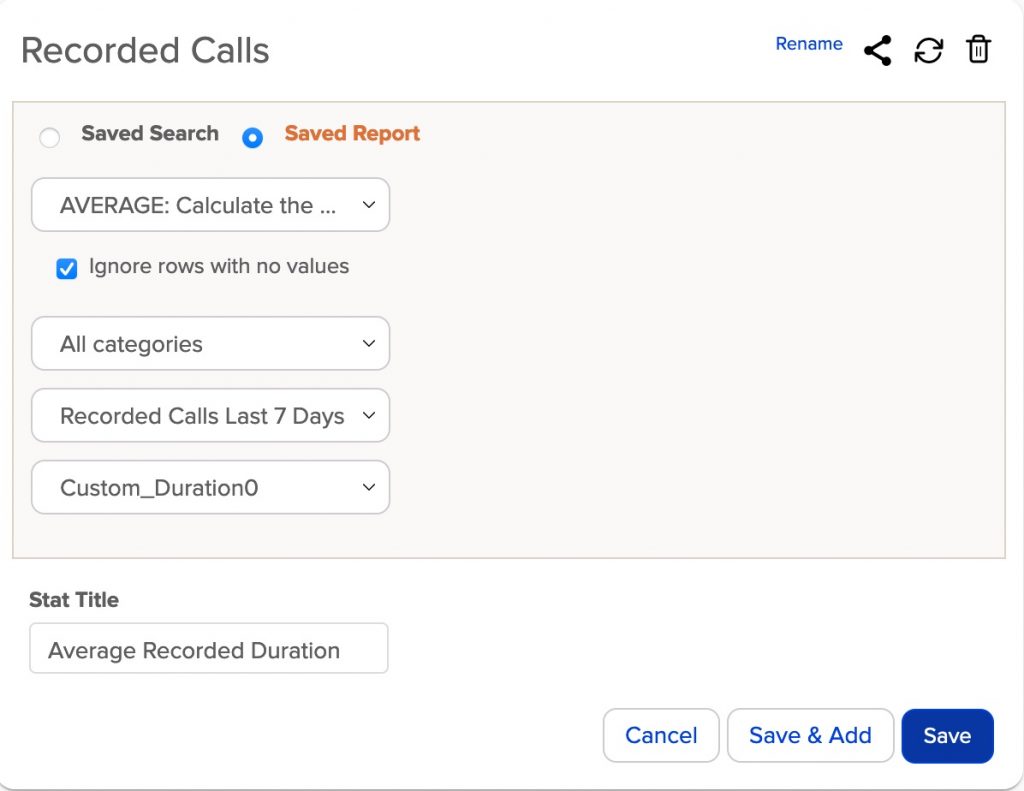
- Average Recorded Duration.
- Click “Add Another Stat”
- Choose “Saved Report”
- Choose “AVERAGE:…” from the first pulldown
- Click to check “Ignore rows with no values”
- Don’t change the second pulldown – leave it as “All categories”
- Choose the saved report name – in this example it is “Recorded Calls Last 7 Days”
- Select a column in the report to Average, which is “Custom_Duration0”
- Choose a name for this statistic, such as “Average Recorded Duration”
- Click “Save”